clearfix
clearfix
Sunbeam Alpine & Tiger Tech Tips
More Tech Tips
Replacing Top Wishbone Bushes
Before Removing Wishbones
Note! Before removing the wishbone note how the camber shims are fitted. After removing, I marked the top and front of the fulcrum pin with a centre punch, I don't think it matters on the top wishbone but I like to replace parts as they were original fitted. I used remanufactured bushes from speedy spares http://www.speedyspares.co.uk/ As they are more original looking than polyurethane and I also hoped would be easier to fit.
Removing Old Bushes
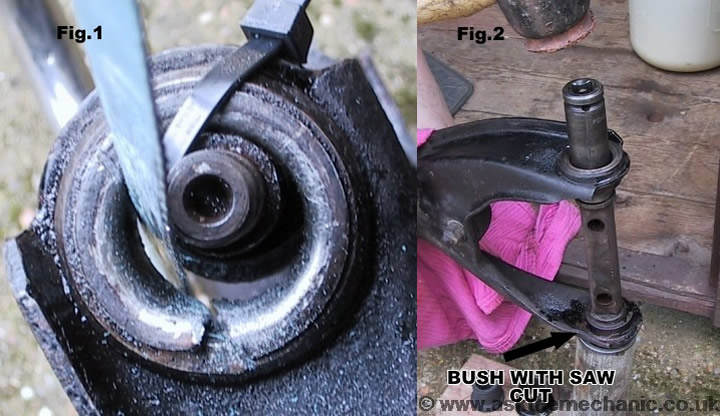
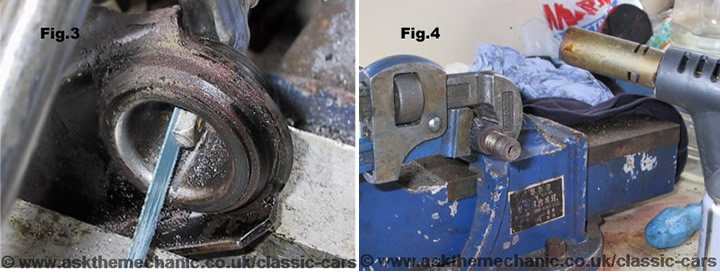
To replace the top wishbone bushes (without the use of a hydraulic press and special tool RG.318) first remove the old perished rubber by digging it out with a screw driver, you can then cable tie the fulcrum pin to one side enabling you to put a saw cut though the outer part of the bush making sure not to cut the wishbone or fulcrum pin Fig.1. Now with a piece of scaffold tubing supporting the wishbone and a deep socket to protect the fulcrum pin thread knock the outer bush (one with saw cut) out of the wishbone using the fulcrum pin as a drift Fig.2.
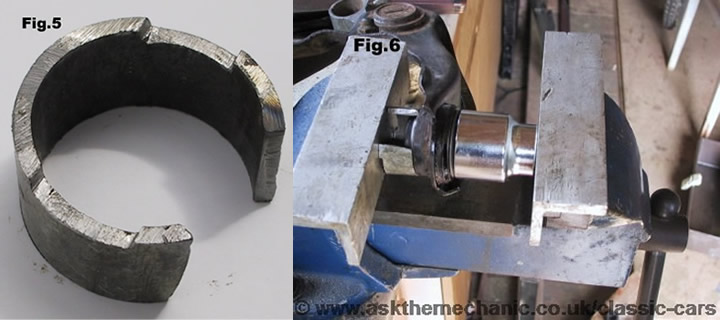
It is now easy to put a saw cut in the other bush Fig.3 and knock out with the fulcrum pin again. If you did not cut the bushes they would be very tight and you would damage the fulcrum pin when knocking them out, with a saw cut they will knock out with very little effort and no damage to the fulcrum pin. Do not put any load on the wishbone unless the end you are working on is fully supported as the wishbone has very little strength between the bush ends and will be damaged.
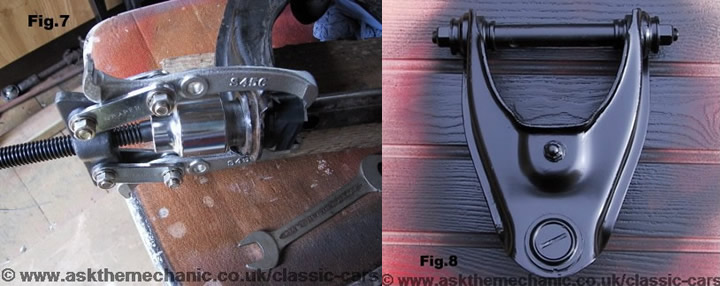
You may find that the inner part of the bush is rusted to the fulcrum pin this can be un-seized with a blowtorch and pipe wrench, then use wire brush to clean up the pin Fig.4.
Fitting New Bushes
You now need to find a piece of tube Fig5 (approx. 1.25inch inner diameter x 0.75 high) that the bush will go through to make a tool to refit the bushes back in the wishbone. (Note the slot is to allow you to remove the tool from the fulcrum pin when fitting the second bush and the cut outs stop the 2 leg puller from slipping).The first bush Fig.6 can be fitted with a vice and large socket, it is easier to start the bush without the slotted tool, when the bush is half way in you can then fit the tool to allow the bush to be pushed fully in.
Note! Don't forget about the front and top marks you put on the fulcrum pin and the washers before fitting the second bush.
As can be seen from the picture Fig.7, the second bush is not as easy to fit, because you have the fulcrum pin in the way, what you need to do is spend some time making sure the wishbone and bush are really smooth at the surfaces where they touch so the new bush sides in easy, I used wet and dry paper to polish the surfaces. Then grease all the touching surfaces, using a 2-legged puller, socket and the slotted tool the bush can be pushed into the wishbone. I found it easier to tape the slotted tool in place as you need both hands to hold the puller and socket. Fig.8 All painted and ready to go back on the car, the fulcrum pin nuts should only be fully tightened with the weight of the car on the road wheels. The front suspension angles and steering alignment should ideally be checked.